Add Text, Sign, Insert Stamp, Add Date, Upload Image, and Add Signature Field
The built-in PDF editing tools in TaxMingle allow CPAs to prepare documents quickly and professionally — all without leaving the platform. This guide walks you through how to use each available tool in the document toolbar.
Open the PDF Editor:
From your Dashboard, go to the left-hand Documents tab. This page displays all uploaded tax documents. Find the document you wish to edit (e.g., f1120.pdf), then look to the Actions column on the right.
Click the PDF Editor icon (orange icon with a document and pencil) as shown in the screenshot. This will open the file in the built-in PDF Editor where you can start making annotations like text, signatures, stamps, and more.

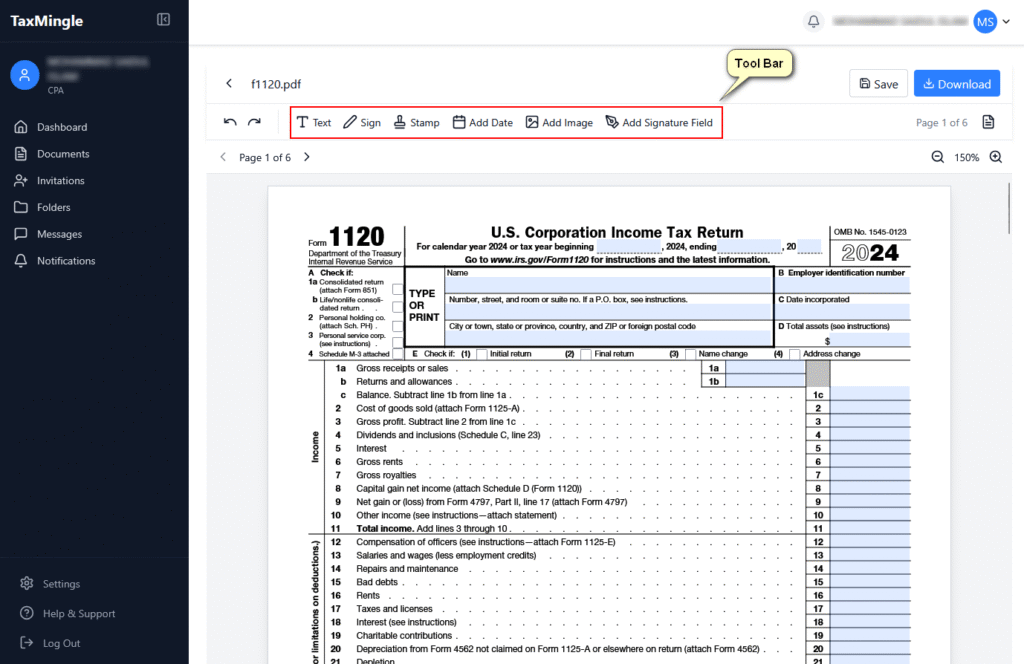
Where to Find the PDF Toolbar
After opening any document (e.g., a tax form like Form 1120), you’ll see the PDF editing toolbar at the top of the viewer. This contains the following tools:
- Text
- Sign
- Stamp
- Add Date
- Add Image
- Add Signature Field
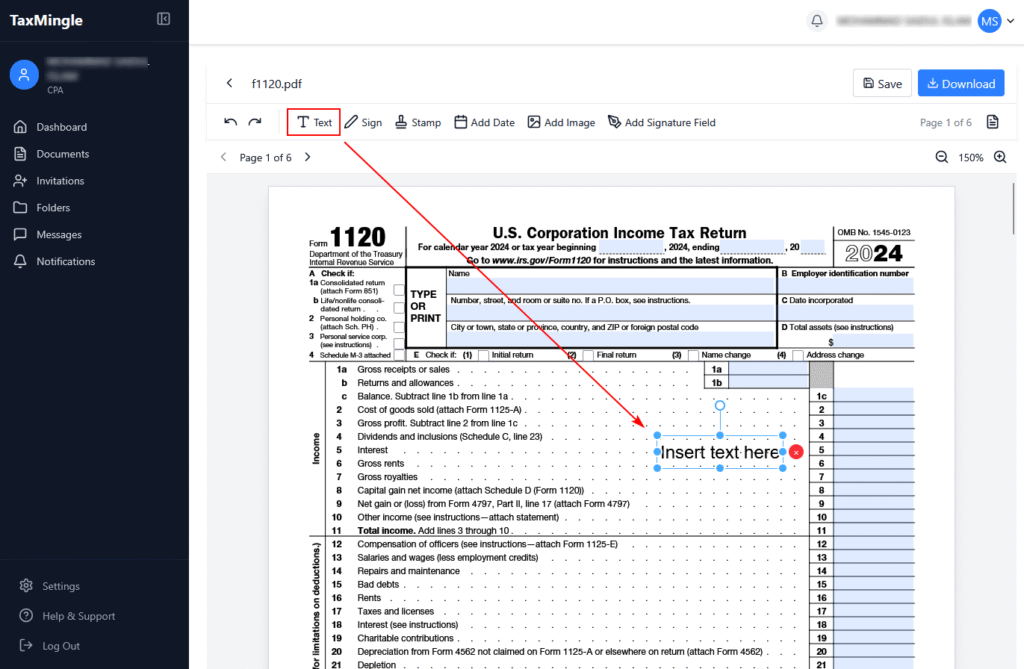
1. How to Add Text
Use the Text tool to insert comments, explanations, or fill out blank fields.
Steps:
- Click the Text icon on the toolbar.
- Click anywhere on the PDF where you want to add text.
- Type your content directly into the field.
- Drag to reposition or click the text to adjust size, font, or color.
2. How to Add a Signature
You can insert your own digital signature directly into a document.
Steps:
- Click the Sign icon.
- Choose or create your signature using one of the available options:
- Draw your signature.
- Type your name and select a font.
- Upload an image of your signature.
- Click Create to place the signature.
- Drag to position it accurately on the document.

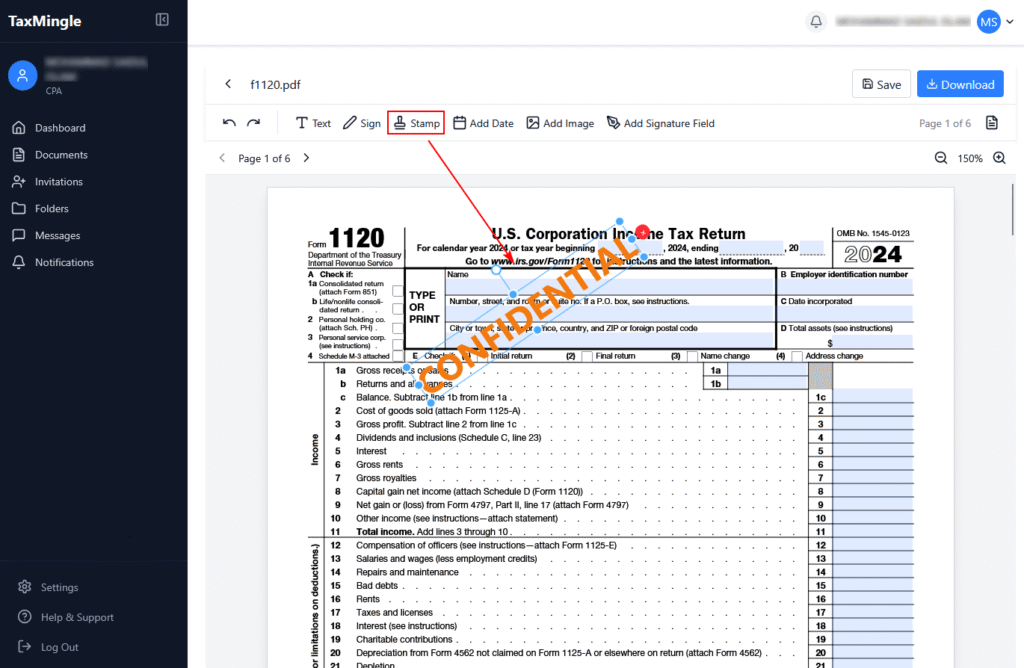
3. How to Add a Stamp
Use stamps like “Approved,” “Draft,” or “Rejected” to quickly label documents.
Steps:
- Click the Stamp icon.
- Choose from pre-defined stamps or upload your own image (JPG/PNG).
- Click the location where the stamp should appear.
- Drag to reposition or resize as needed.
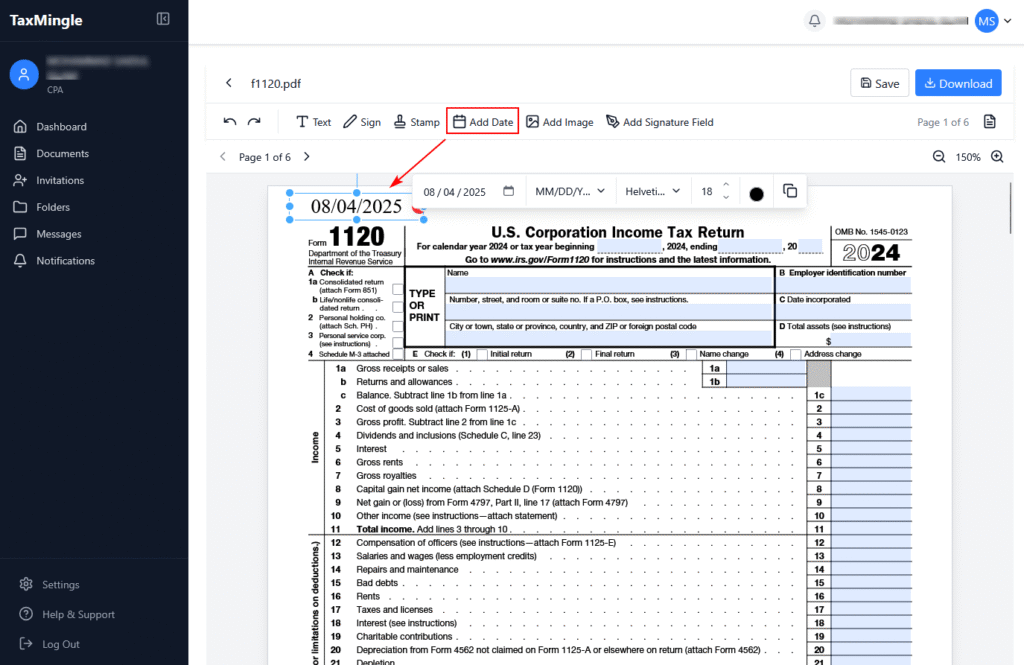
4. How to Add a Date
Insert today’s date or choose a custom one with various formatting options.
Steps:
- Click the Add Date icon.
- Click the area on the PDF where the date should appear.
- A small input box will appear — select your preferred:
- Date format (MM/DD/YYYY, DD-MM-YYYY, etc.)
- Font style, size, and color
- Confirm to place the formatted date.
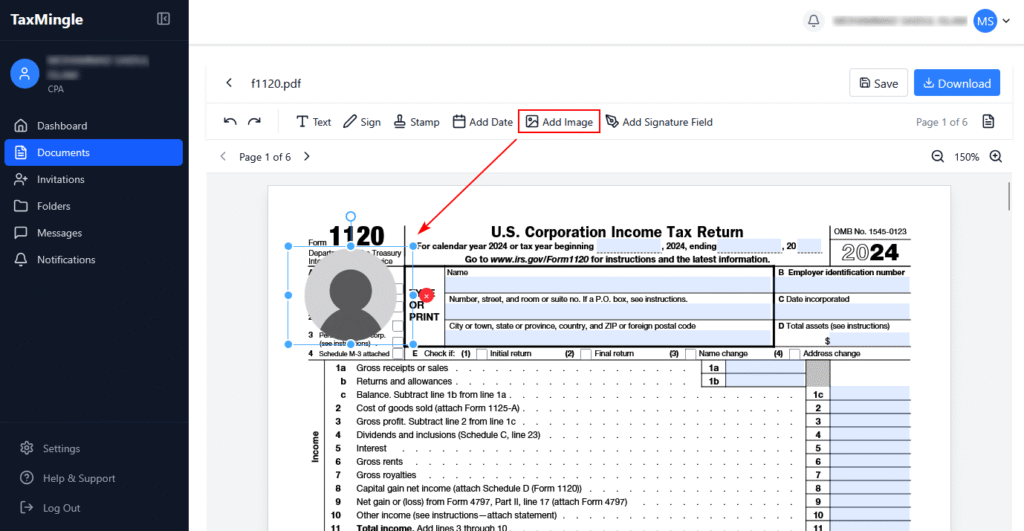
5. How to Add an Image
Insert supporting visuals, scanned pages, or logos directly into your PDF.
Steps:
- Click the Add Image icon.
- Upload the image file from your computer.
- Click on the document to place the image.
- Resize and reposition the image as needed.
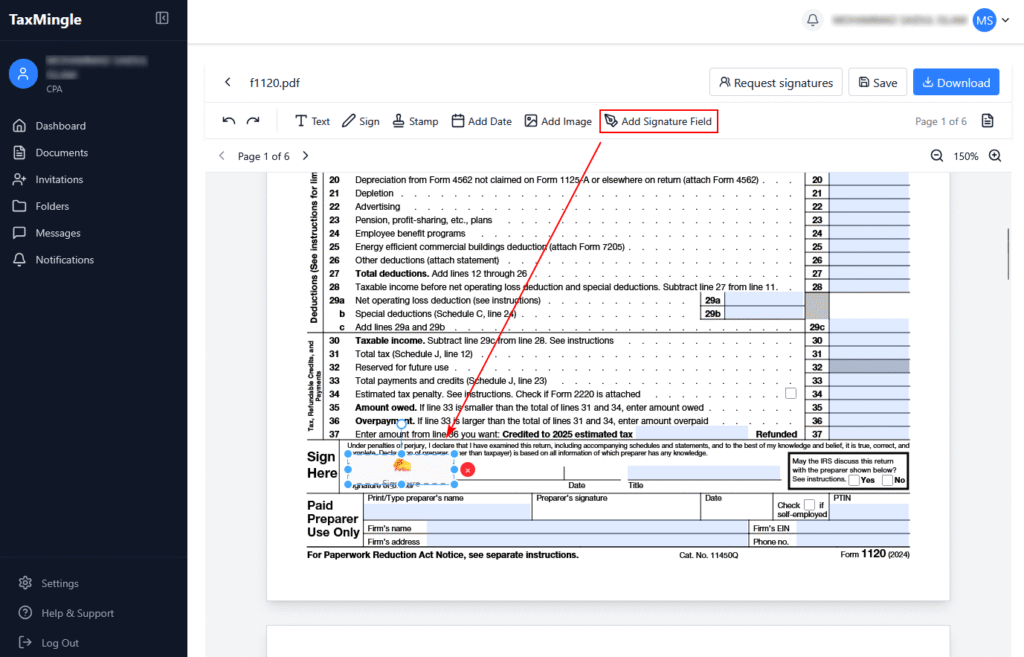
6. How to Add a Signature Field
This allows you to designate where a client should sign the document.
Steps:
- Click the Add Signature Field icon.
- Click the document area where the client’s signature is required.
- A placeholder will appear labeled “Sign Here”.
- You can assign this field to a specific client when requesting a signature.